
How to Keep Certain TikTok Reposts When Deleting Reposts with ClearTok
Learn how to keep certain TikTok reposts when cleaning up your repost history with ClearTok. Manually choose reposts to delete or use filters to keep recent reposts and reposts from selected creators.
A simple guide to manual selection and repost filters.
ClearTok helps you clean up TikTok reposts without forcing you to delete everything. You can decide what stays in two ways: first by manually selecting or unselecting reposts in the repost list, and second by using Repost filters when you want to keep recent reposts or reposts from specific creators.
1. Start by Scanning Your Reposts
Open ClearTok and tap Scan for Reposts. ClearTok will scan your TikTok repost history and show the reposts it finds.
Tap "Scan for Reposts" to scan your repost history.
2. First, You Can Manually Choose What Not to Delete
After the scan, ClearTok shows your reposts in a list. This is the most direct way to control the cleanup.
- Reposts that are selected will be removed.
- Reposts that are unselected will be kept.
- If there are only a few reposts you want to keep, simply unselect them before deleting.
- Always review the list before tapping Remove Selected Reposts.
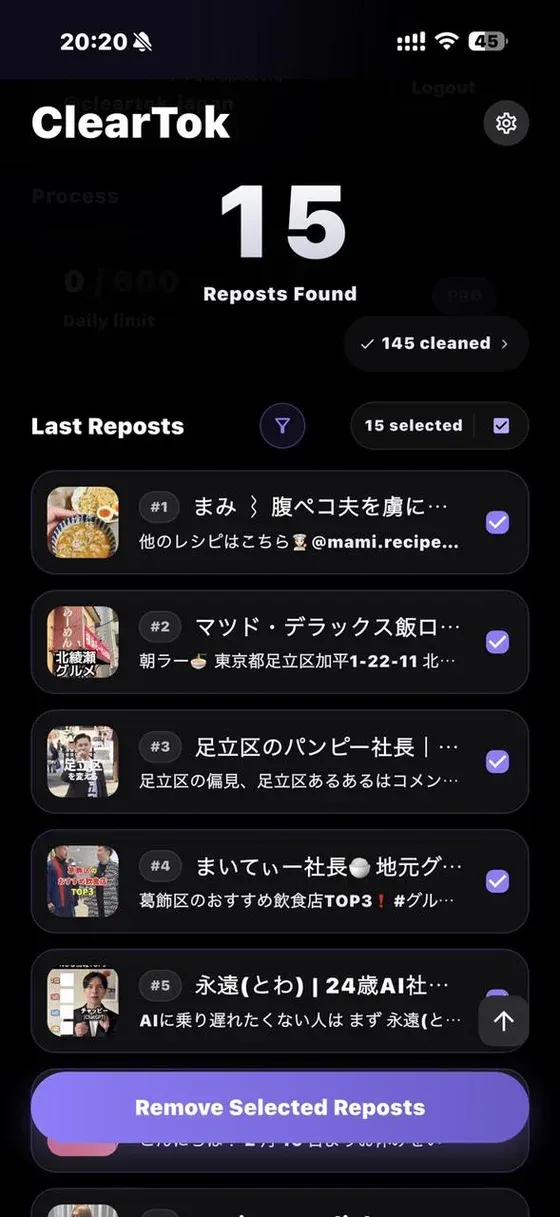
After scanning, manually select or unselect reposts in the repost list.
3. Use Repost Filters When You Want to Keep Reposts by Rule
Manual selection is useful when you want to check reposts one by one. But sometimes you already know what you want to keep. For example, you may want to keep your newest reposts, or keep reposts from a favorite TikTok creator.
In that case, open Settings and tap Repost filters.
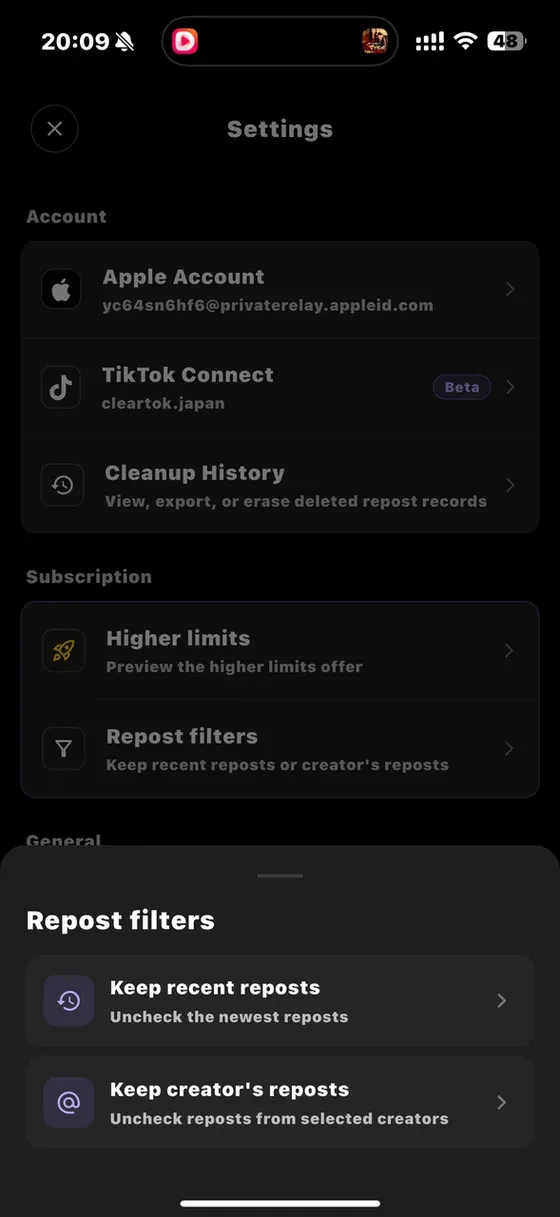
Open Settings > Repost filters to use automatic keep rules.
4. Keep Recent Reposts
Choose Keep recent reposts if you do not want to delete your newest reposts. Set how many of the newest reposts you want to keep, then tap Apply filter.
This does not delete anything immediately. It updates the repost selection so your newest reposts are protected from deletion.
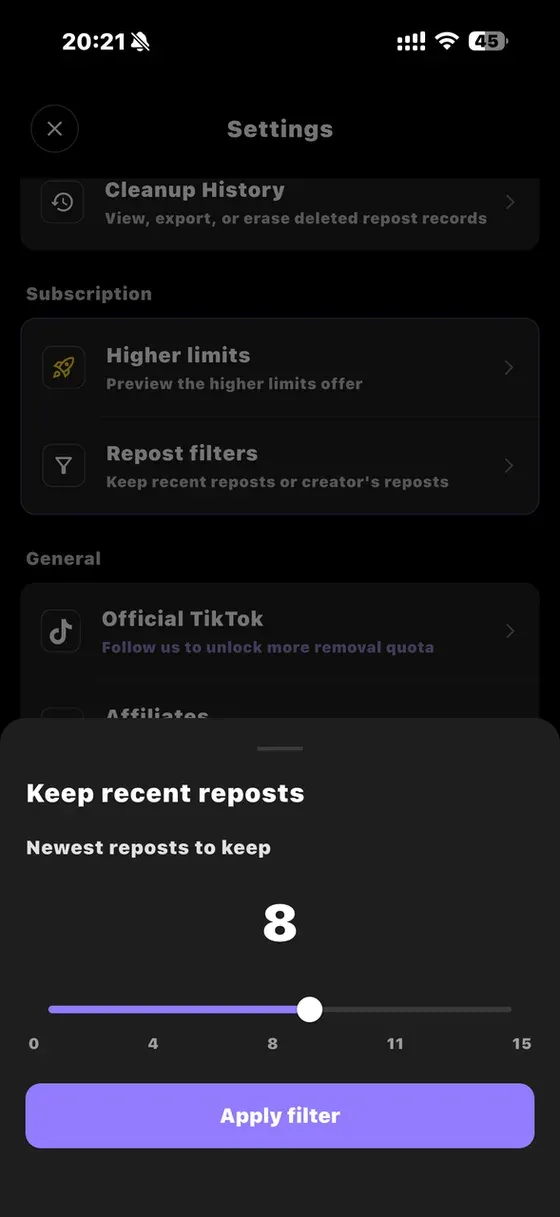
Use "Keep recent reposts" to keep your newest reposts.
5. Keep Reposts from Selected Creators
Choose Keep creator's reposts if there are creators whose TikTok videos you do not want to delete from your repost history.
Select the creators you want to keep, then tap Apply filter. ClearTok will unselect reposts from those creators so they are kept.

Use "Keep creator's reposts" to keep reposts from selected creators.
6. Review Everything Before Removing
After using filters, return to the repost list. You can still manually change the selection before deleting. This gives you both speed and control: filters help you protect many reposts quickly, and manual selection lets you make final adjustments.
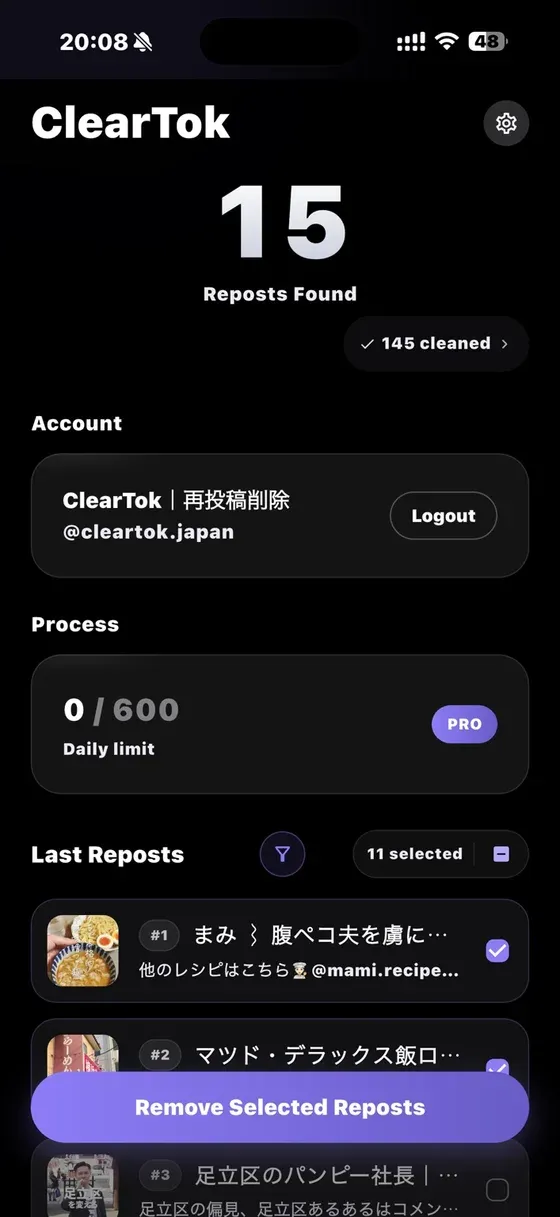
Review the final selection before removing selected reposts.
Quick Summary
- Tap Scan for Reposts.
- Manually unselect any reposts you do not want to delete.
- If you want to keep recent reposts or reposts from favorite creators, open Settings > Repost filters.
- Choose Keep recent reposts or Keep creator's reposts.
- Tap Apply filter.
- Return to the repost list and review the final selection.
- Tap Remove Selected Reposts only when you are ready.
Related Guides
Ready to Try ClearTok?
Stop deleting reposts one by one. Get ClearTok and clean up your entire TikTok profile in minutes.
Browser Extension
Mobile App